I have a confession to make. I am completely, unapologetically obsessed with my front door during the month of October. It is not about having the spookiest house on the block, though that is a nice bonus. It is about that single, magical moment when a guest arrives for my annual Halloween bash. They pause, their hand hovering over the doorbell, and just stare. Their eyes light up, and I know my wreath has done its job. It is the opening scene of our Halloween story, and let me tell you, setting that stage is deeply, wonderfully satisfying. This guide is packed with my best tips for creating a stunning DIY Halloween wreath that will boost your curb appeal and make your entrance the talk of the neighborhood. I used to be one of those people who thought wreaths were a strictly December affair. Boy, was I wrong. Now, I find myself sketching wreath ideas on the back of grocery lists in July, my craft closet slowly transforming into a Halloween monster’s lair of ribbons, feathers, and faux cobwebs. There is something so rewarding about taking a simple circular form and turning it into a piece of art that says, Get ready, fun and spooky times are waiting inside.
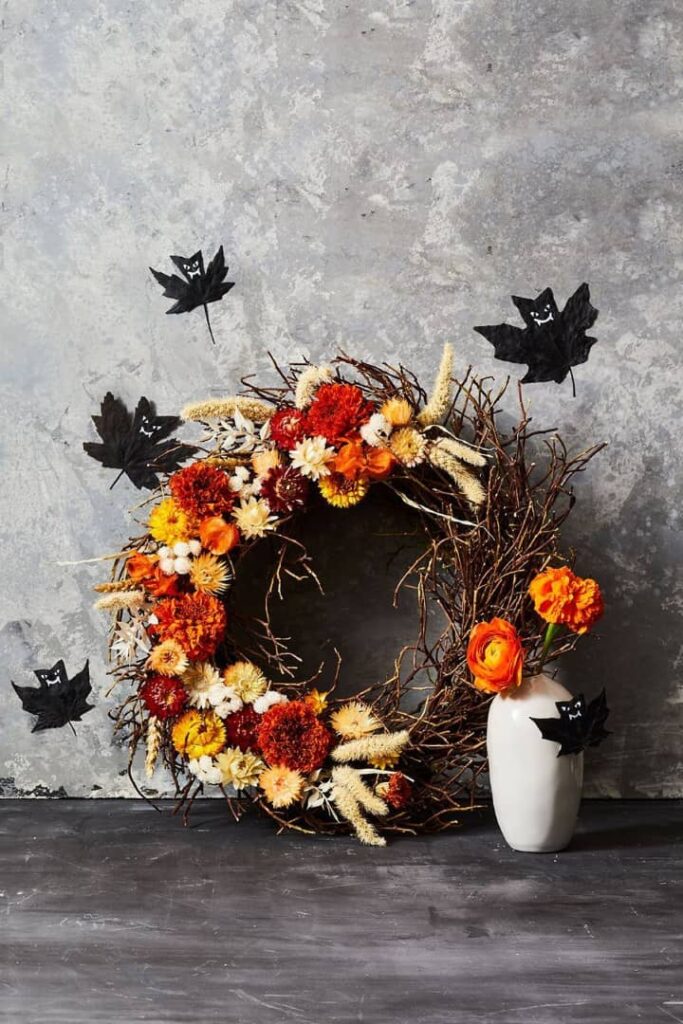
Before you dive into a sea of orange glitter and plastic spiders, you have to ask yourself: what vibe are you going for? Your front door wreath is your home’s first impression, after all. Are you aiming for a gentle, family-friendly welcome, or are you trying to give the mailman a little jump scare? I have experimented with all the styles over the years, and I have learned that picking a lane makes the entire process so much easier. For years, I was a die-hard traditionalist. You just cannot go wrong with the classic Halloween color scheme. A simple black grapevine wreath base, some vibrant orange ribbon, and a few mini pumpkins just scream autumn festivities. The beauty of this approach is its versatility.
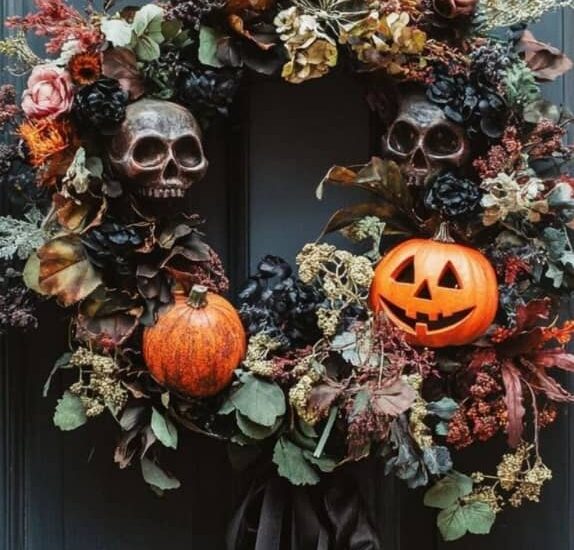
One year, I went for a more elegant look with matte black berries and deep burgundy leaves. Another year, I leaned into pure fun with glittery bats and a cheerful, felt jack-o-lantern. The classic palette is a reliable foundation for any DIY Halloween wreath. Then, a few years back, I decided to get a little moodier. I wanted something that felt like it crawled out of a classic gothic novel. I created a wreath using only black feathers, some seriously creepy dried branches, and a single, beady-eyed crow perched at the bottom. I did not use a single spot of orange. The result was stunningly spooky and surprisingly sophisticated. People commented on it for weeks! This is where you can get really creative with texture. Think about using tattered black cheesecloth, weathered pieces of wood, or even some faux raven feathers. The goal is to create a sense of eerie elegance that makes people look twice.
Of course, not every Halloween needs to be terrifying. Some of my favorite wreaths have been the whimsical ones. I am talking about friendly ghosts cut from white felt, a cheerful “Boo” banner, and a color scheme that includes happy purples and greens. This is the perfect style if you have little ones or just want your door to feel inviting rather than intimidating. It is all about the smile factor. A whimsical Halloween door decor piece says, “We are here for candy and good times. Alright, let us get into the nitty-gritty. I have made just about every wreath-making mistake you can imagine, so you do not have to. My first big lesson? Your adhesive matters. A lot. Hot glue is a fantastic, quick-drying best friend for lightweight items like ribbons and plastic insects. But for anything with a little heft to it a small gourd, a chunky ornament you absolutely must reinforce it with floral wire. I still cringe remembering the great pumpkin avalanche of 2018, where my beautiful, glue-only creation shed its decorations all over my welcome mat.
Another trap I used to fall into was the “more is more” philosophy. I would see a cool spider at the craft store, then some neat berries, then a shiny ribbon, and before I knew it, my wreath looked like a Halloween store threw up on it. Now, I follow a simple rule: pick three to five key elements and build around them. This creates focus and visual interest without the chaos. Start with your largest elements first, then layer in your medium and small pieces. This creates a depth that makes your wreath look professional and intentional from across the street. Oh, and one last pro-tip for your outdoor Halloween wreath: think about the weather.
If you live somewhere with rainy Octobers, do yourself a favor and give your finished masterpiece a light spray with a clear, outdoor-rated sealant. It is a simple step that prevents your beautiful black feathers from becoming a soggy, sad mess. In the end, the best DIY Halloween wreath is the one that makes you happy. It is the one that makes you smile a little every time you come home. It is your personal welcome sign to the spookiest, most creative time of the year. So grab a wreath form, let your imagination run wild, and create something that sets the perfect tone for your Halloween celebrations.
References
Better Homes & Gardens. (2024). Seasonal wreath making techniques and materials guide. https://www.bhg.com/
National Endowment for the Arts. (2023). The cultural significance of seasonal home decoration. https://www.arts.gov/
Journal of Consumer Research. (2022). Holiday decorating and neighborhood social cohesion. https://academic.oup.com/jcr